User Manual
Micro Inverter WIFI
Cloud Monitoring User Manual
Read Me First
** User manual subject to change without notice**
- Note that there is a risk of electric shock when connecting the micro-inverter!
- The micro-inverter heats up during operation! Protect yourself accordingly from burns!
- Before configuring WiFi cloud monitoring,please correctly install the micro inverterand make it work normally
- Asmart device(smartphone or tablet)with Bluetooth function and Android or lS system and a wireless network devicee.g.wireless routerthat can provide WiFi and Internet service must be available
- To confiqure WLAN cloud monitoring,first switch on the Bluetooth function of the smart device.
- Make sure that your smart device uses the same WiFi network as the micro inverter to be configured and that it can connect to wireless network devices and access the lnternet in the same location of the micro inverter
- Make sure that the distance between the wireless network device and the micro-inverter does not exceed 20 m and that there are no or few obstacles
Hardware Description

WIFI Status LED Display
- The blue light flashes after always on = the WiFi cloud monitoring module is waiting for configuration.
- The blue light off after always on = the WiFi cloud monitoring module starts and enters the normal working state.
- The blue light flashes = the network is not configured or the network cannot connect to the wireless network device, or the micro inverter has been deleted in the cloud.
- No light = WiFi cloud monitoring is working normally.
Preparation Before Configuration And Use
- Install the micro inverter correctly and make it worknormally to generate power
- Download and install the Home or"Smart Life" app by searching for it in the corresponding Android or Apple app store.
- Turn on the Bluetooth function of your smart device
- Check that your wireless network device(such as wireless router)is working properly and connected to the Internet.
- Use your smart device(Home /"Smart Life"App installed)at the installation location of micro inverter to connect to the wireless network device.If you can access the Internet normally, follow the instructions for configuration and usage on the next page.

Configura tion Steps Of WIFI Cloud Monitoring

01
Download in mobile application: smartlife or direct code scanning

02
Register personal account

03
Restore factory se ttings Press and hold the red key for 5-10 seconds and release it. The blue light is flashing and the instrument is connected successfully

04
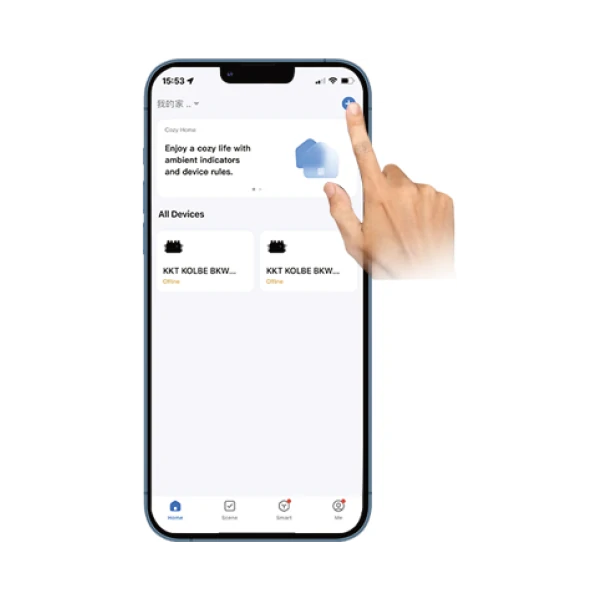
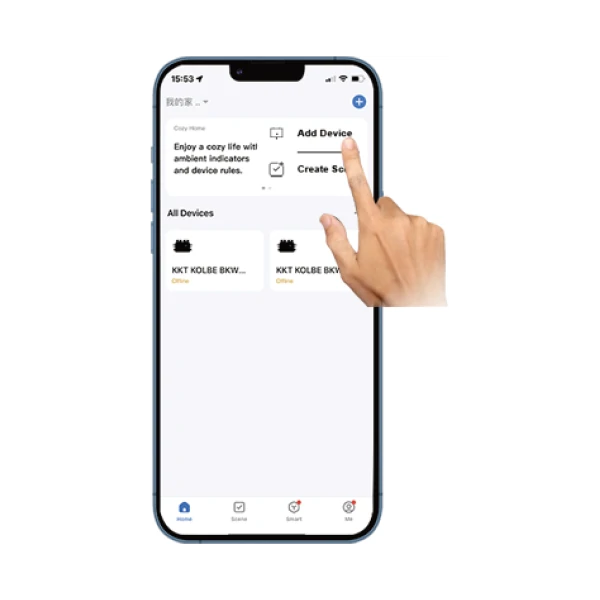
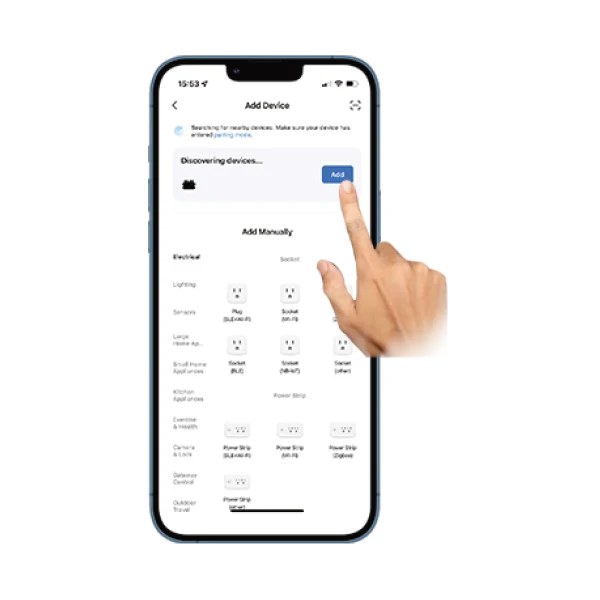
Add inverter

05
Further add confirmation information

06
Make sure the phone is in Bluetooth on or WiFi status

07
Enter your home WIFI account information password

08
Click Next to install and modify the name and account freely

09
The interface can control the system switch normally. The connection is successful

10
The connection is successful, and the green light of the inverter is always on in normal operation. Occasionally flashing instrument MPPT is tracking the optimal voltage
Usage Of WIFI Cloud Monitoring App
Modify Device Name
1. Click the device to be modified in the device list on the home page to enter the device information details page (Figure 5).
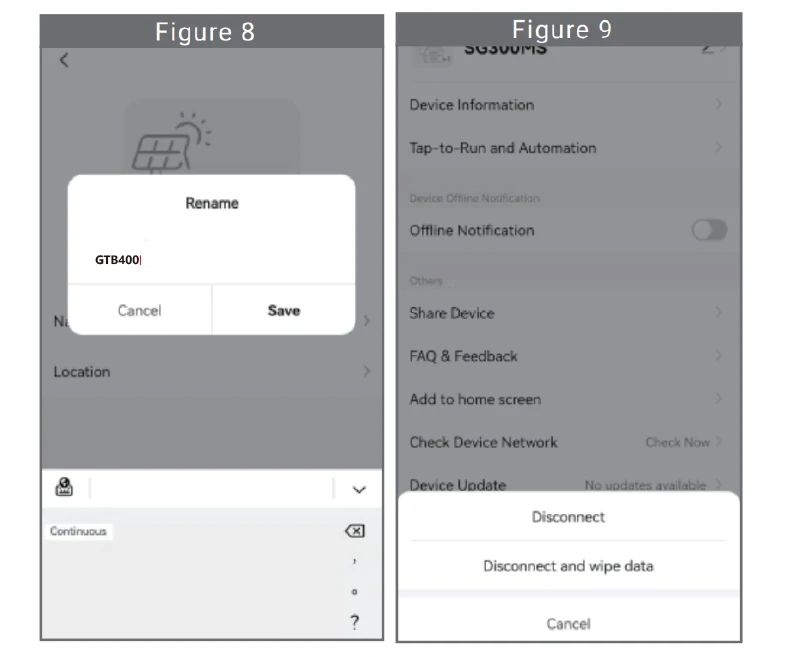
2. Click the button in the upper right to enter the device setting page (Figure 6), Continue to click the upper button to the page of name & position (Figure 7) click name item, then enter a new name and save it (Figure 8).


Remove Device
1. Click the device to be deleted in the device list on the home page to enter thedevice information details page (Figure 5).
2. Click the button in the upper right to enter the device stting page (Figure 6),Click "Remove Device" button below (Figure 9), click the "Disconnect" button toremove the device or click the "Disconnect and wipe data"button to remove thedevice and clear all data saved by the device in the cloud at the same time.
Share Device With Others
1. Click the device to be shared in the device list on the home page to enter the device information details page (Figure 5).
2. Click the button in the upper right to enter the device stting page (Figure 6).
3. Click the "Share Device" item to enter the device sharing page (Figure 10), click Add Sharing button to enter "Add Sharing" page (Figure 11), and select best sharing way that you think it is most convenient to share the link of micro inverter.

